Make Art with the Materials Lab at Home
Get inspired by artworks in the collections of the Harvard Art Museums and Make Art at home! Enjoy this series of prompts designed by the Materials Lab to encourage you to experiment with artistic processes using materials and implements found around the house. Please visit the Materials Lab at Home for more.
Share your artwork and something about your process with us on social media by tagging @harvardartmuseums and using #ARTSFIRST and #MakeArt!
Collage
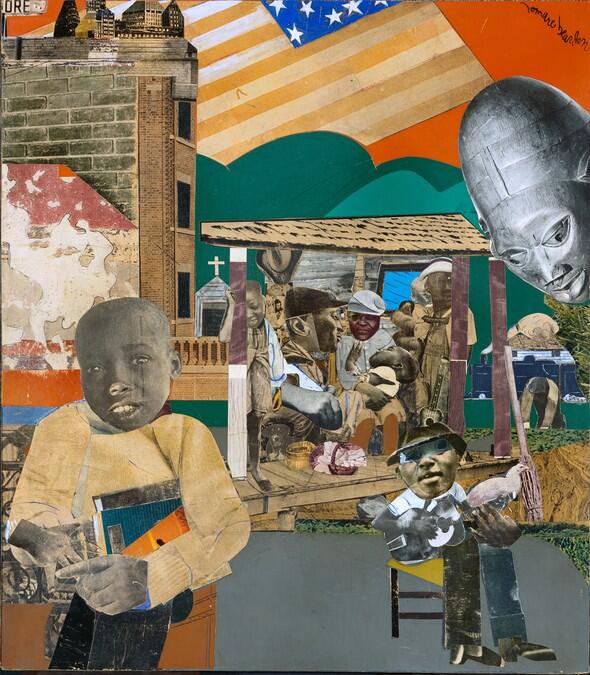
Romare Bearden (1911-1988) was a key figure in American art who experimented with a multitude of media. He is best known for the innovative and unique collages that he started experimenting with in the early 1960s and that represent scenes of African American life. The works are densely layered—both figuratively and metaphorically—using a variety of materials, including cut paper, magazine photographs, foil, and reproductions of other art works. Bearden was very deliberate in the way he constructed his compositions. He played extensively with color, composition, and dimensionality, mixing flat, two-dimensional surfaces such as paper with more textured materials such as fabric and wood. On occasion he would manipulate the surfaces of his works using tools such as sandpaper, peroxide, and bleach.
Learn from the artist about his process and the symbolism in the short video “Trains, Snakes, and Guitars: The Collages of Romare Bearden” from SFMOMA.
German Expressionism, Byzantine mosaics, Italian frescoes, Chinese landscape paintings, African art, Japanese prints, and patchwork quilts, not to mention the Harlem Renaissance and new trends in modern art, were among the wide-ranging sources that inspired Romare Bearden. The color and spatial composition of his works reflect these many influences and his love, above all, of music. Bearden often described both his process and works in musical terms. PBS's wonderful short film "Romare Bearden, The Dove, 1964" highlights the influence that music had on his compositions.
The extensive play with both form and content is apparent in Soul History. Mixing black-and-white with images of vibrant color, the collage synthesizes imagery from categories that might at first seem completely unrelated. The work seems to hold disparate times and places on the same plane, weaving together experiences and memories of the American South and dense cities of the Northeast.
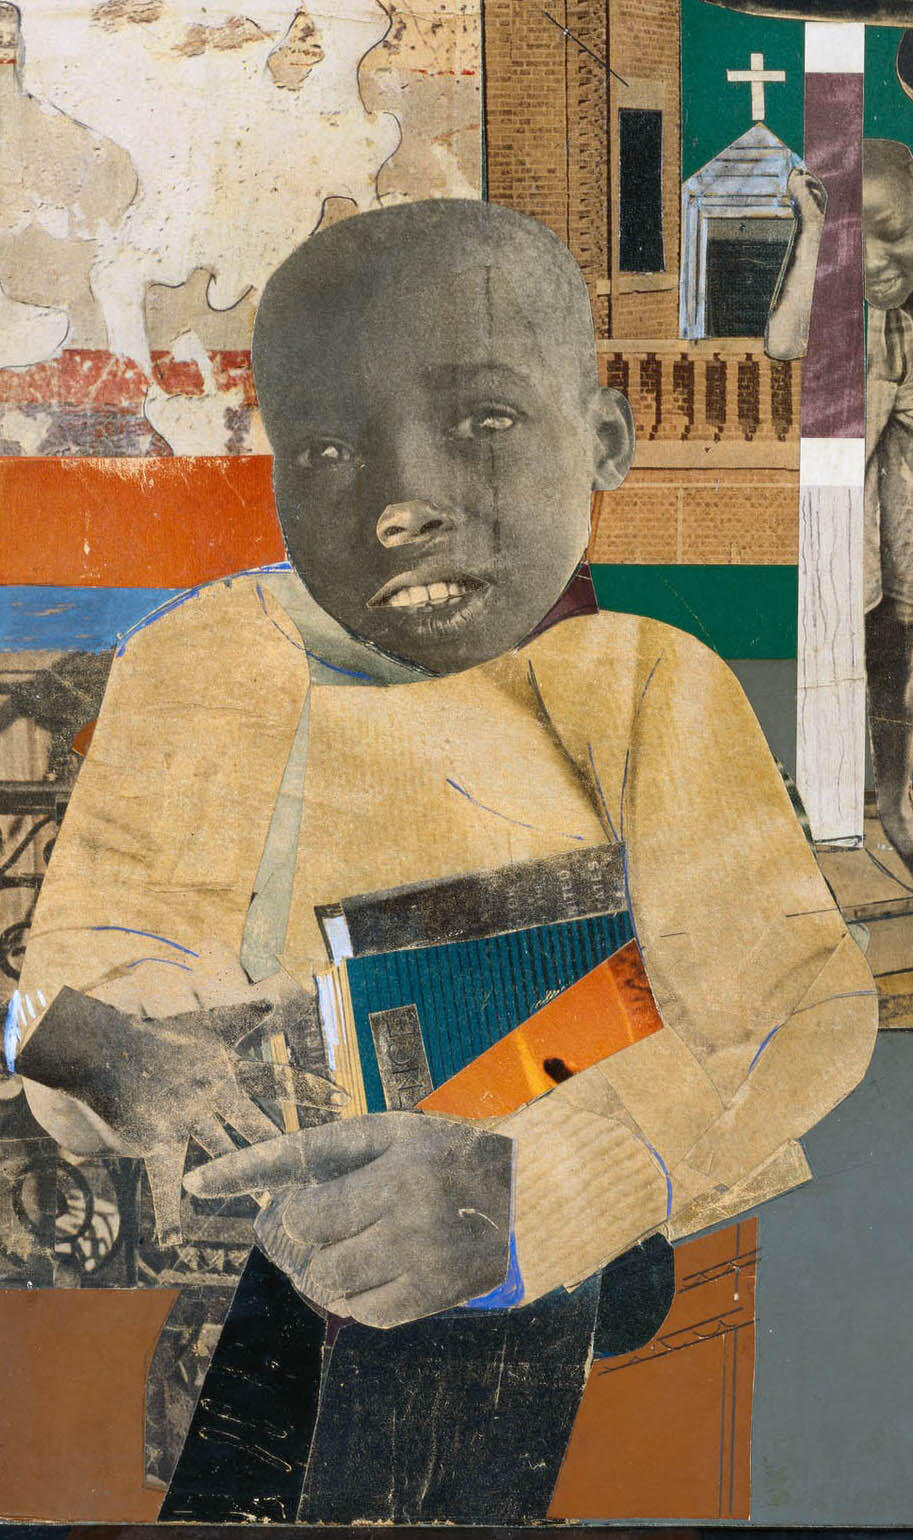
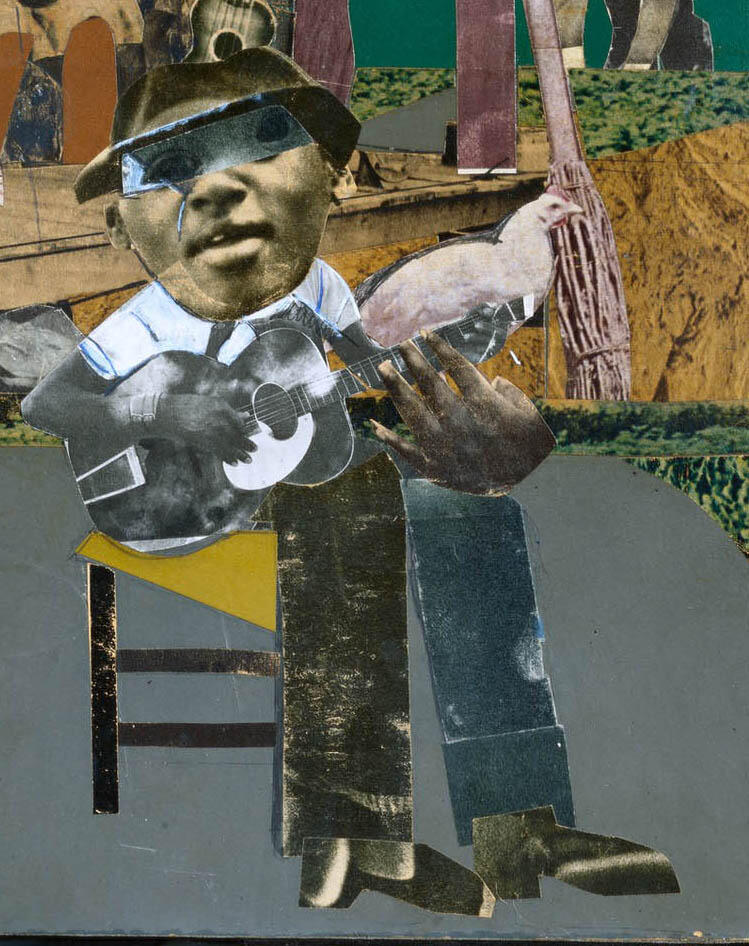
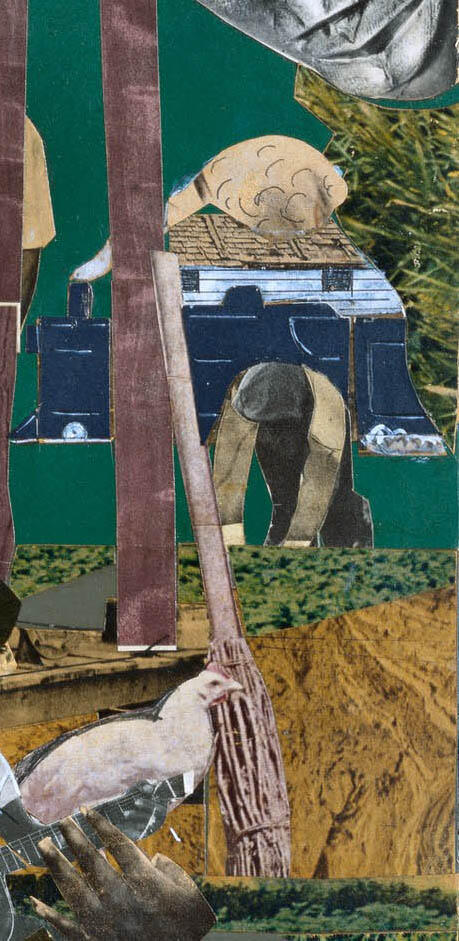
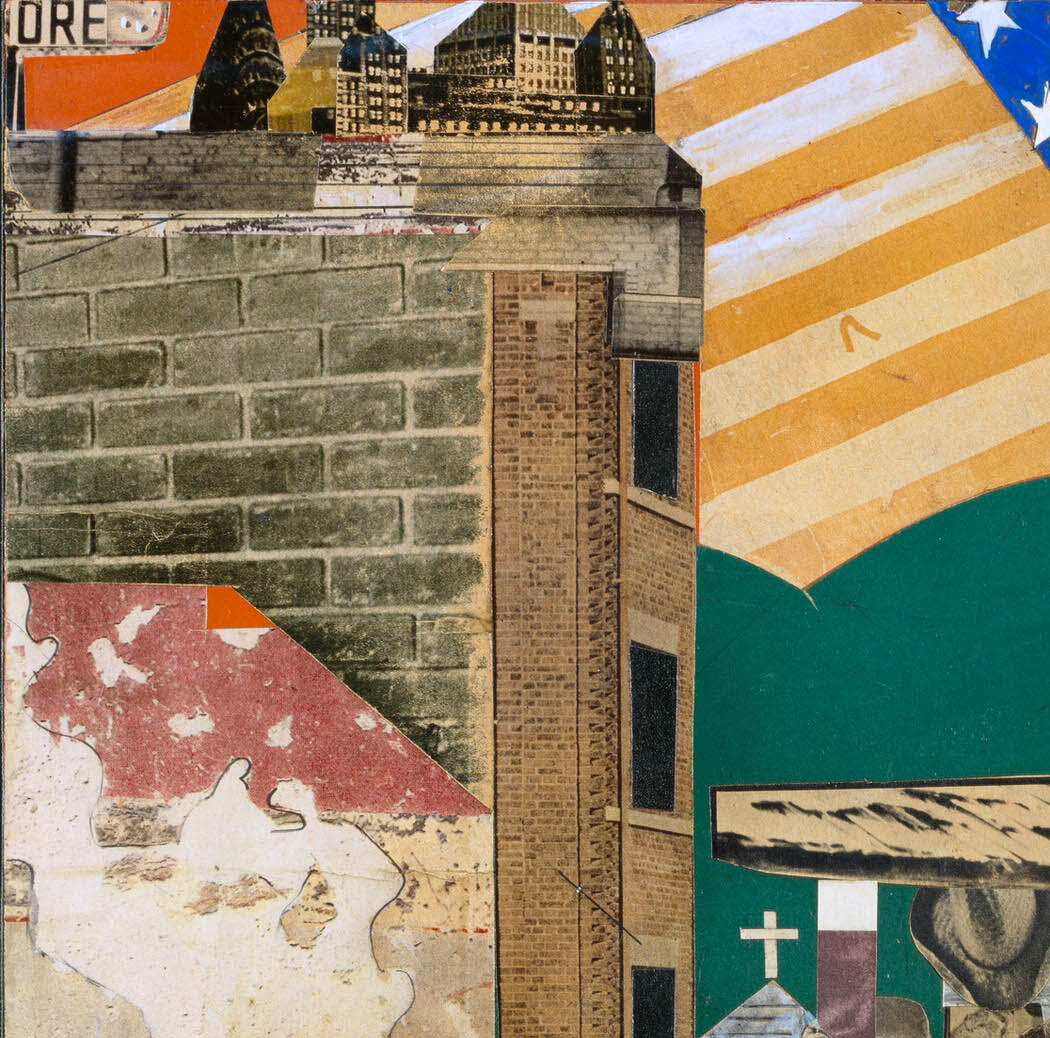
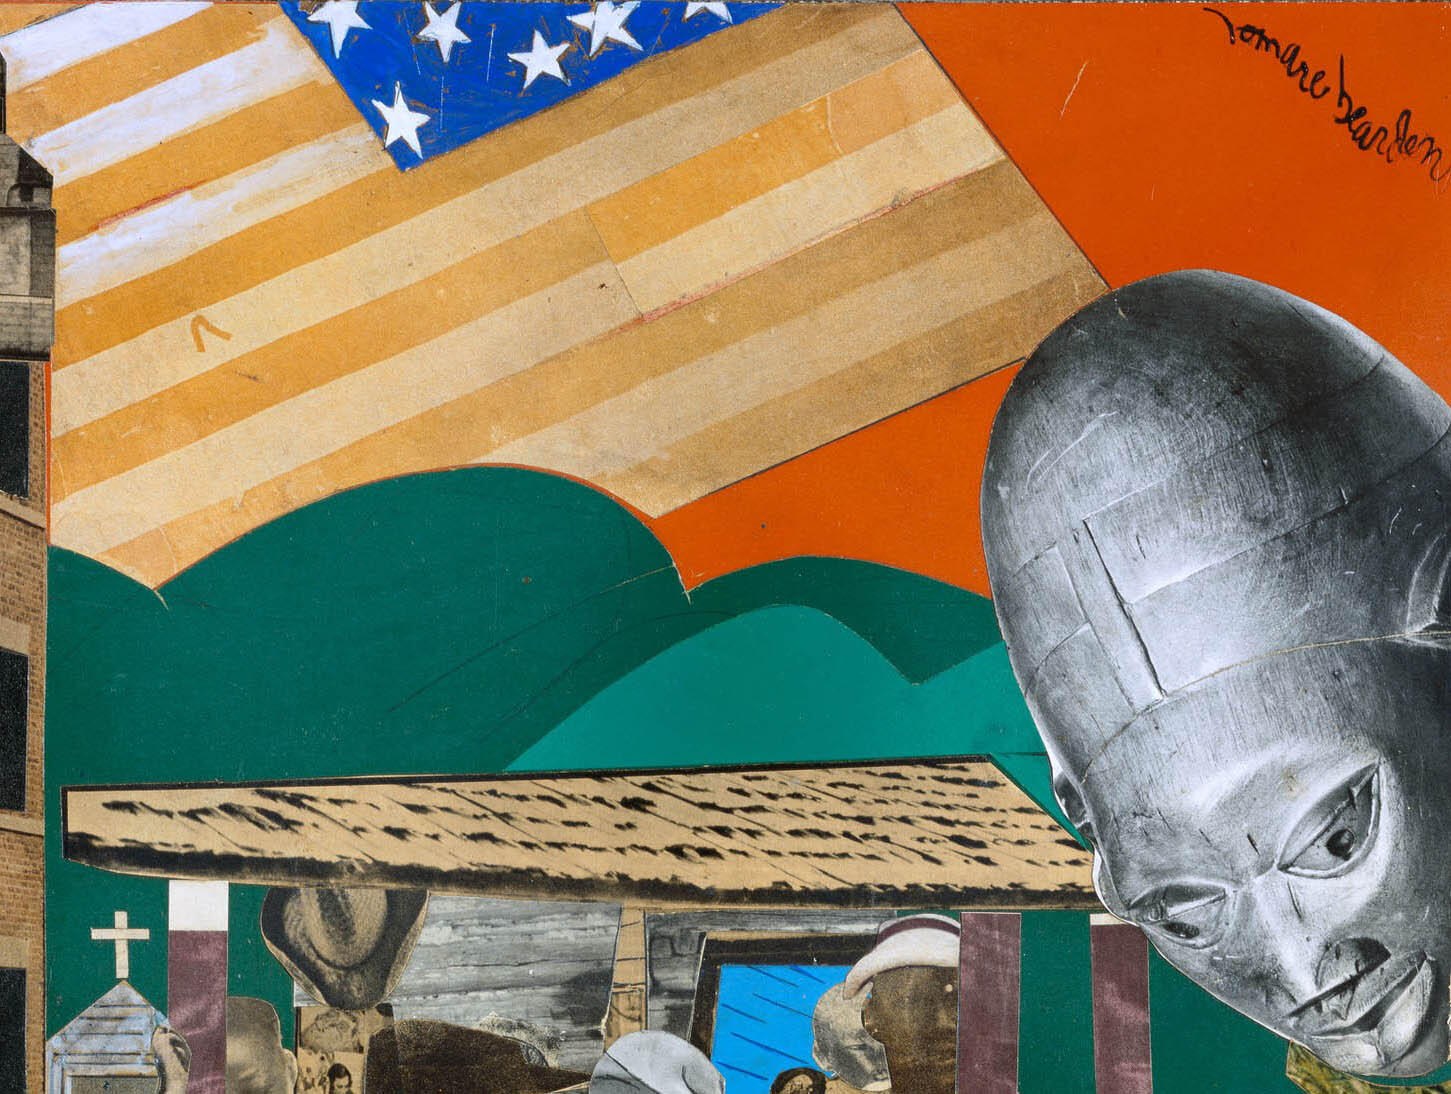
Details from Romare Bearden, Soul History, 1969, Collage, graphite, colored pencil, and gouache on Masonite. Harvard Art Museums/Fogg Museum, Gift of Abram M. London, M.D., Class of 1957, 1997.210.
Look closely at the overall image and at details of the collage. What do you think is going on in this scene? What kinds of materials, images, colors, textures did the artist use? What are some of the symbols that were important to the artist? What different cultural influences do they relate to? How did he bring them all together in his composition?
Create your own collage inspired by this work. Start by sketching out the composition. It could be based a scene that you have in front of you, or relate to other places and times— in the past or an imagined future. Feel free to riff on an art work, including from the Harvard Art Museums' collections. Combine elements from your environment and culture. How might you use your favorite music to inspire your composition?
Collect elements cut from magazines or other printed materials, colored and textured paper, fabric and other materials. You may also want to use pencils, markers, or paint to enhance your composition. Consider how color, forms, patterns, select images contribute to the visual representation of your chosen theme— its mood, the sense of space, time, rhythm.
Take the time you need to gather the pieces and to play with their arrangement. We recommend using a thicker piece of paper or cardboard as support to glue the different elements down. You can also expand the collage into 3-D!
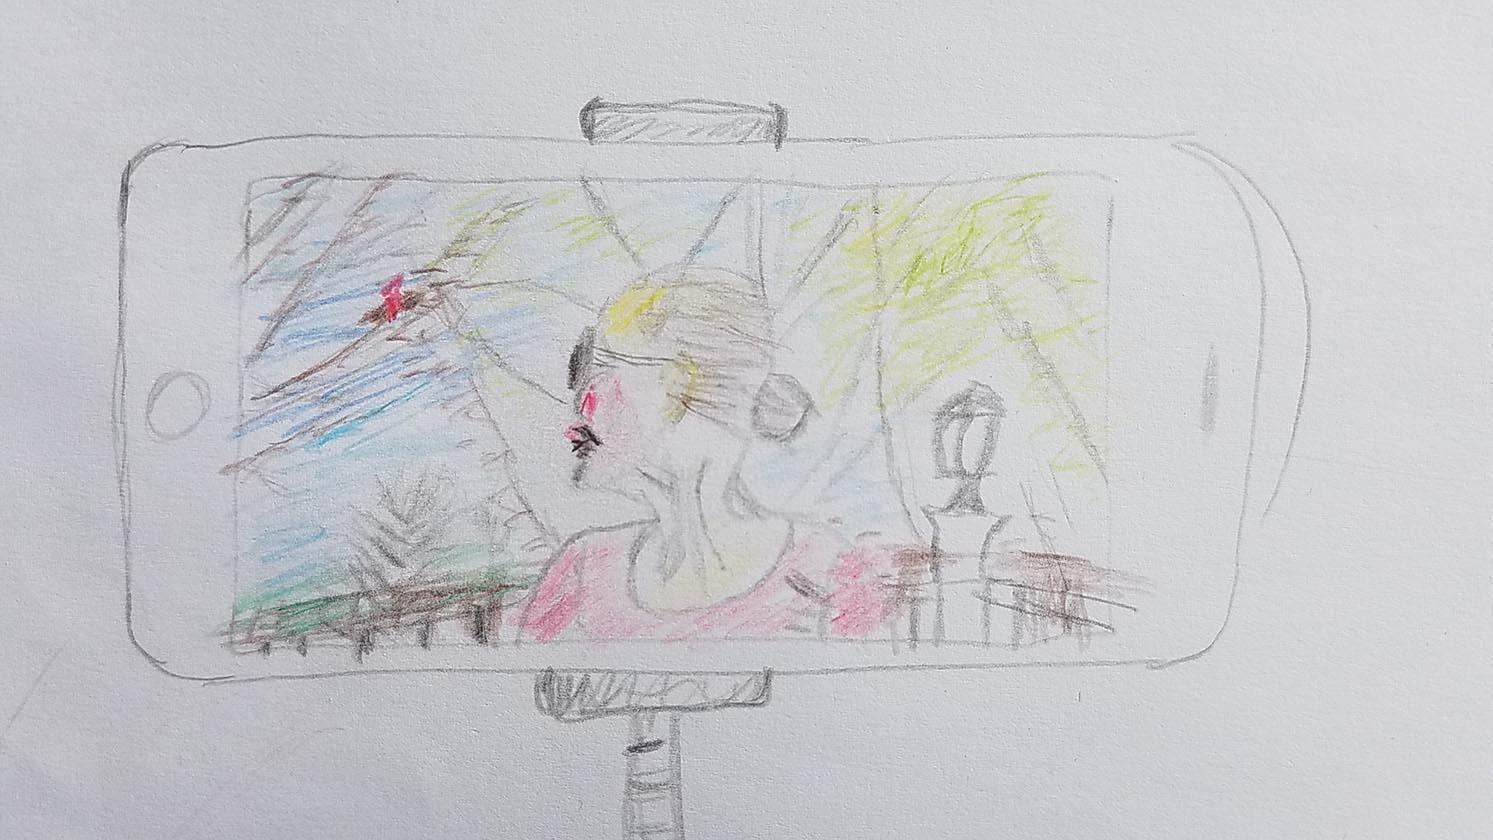
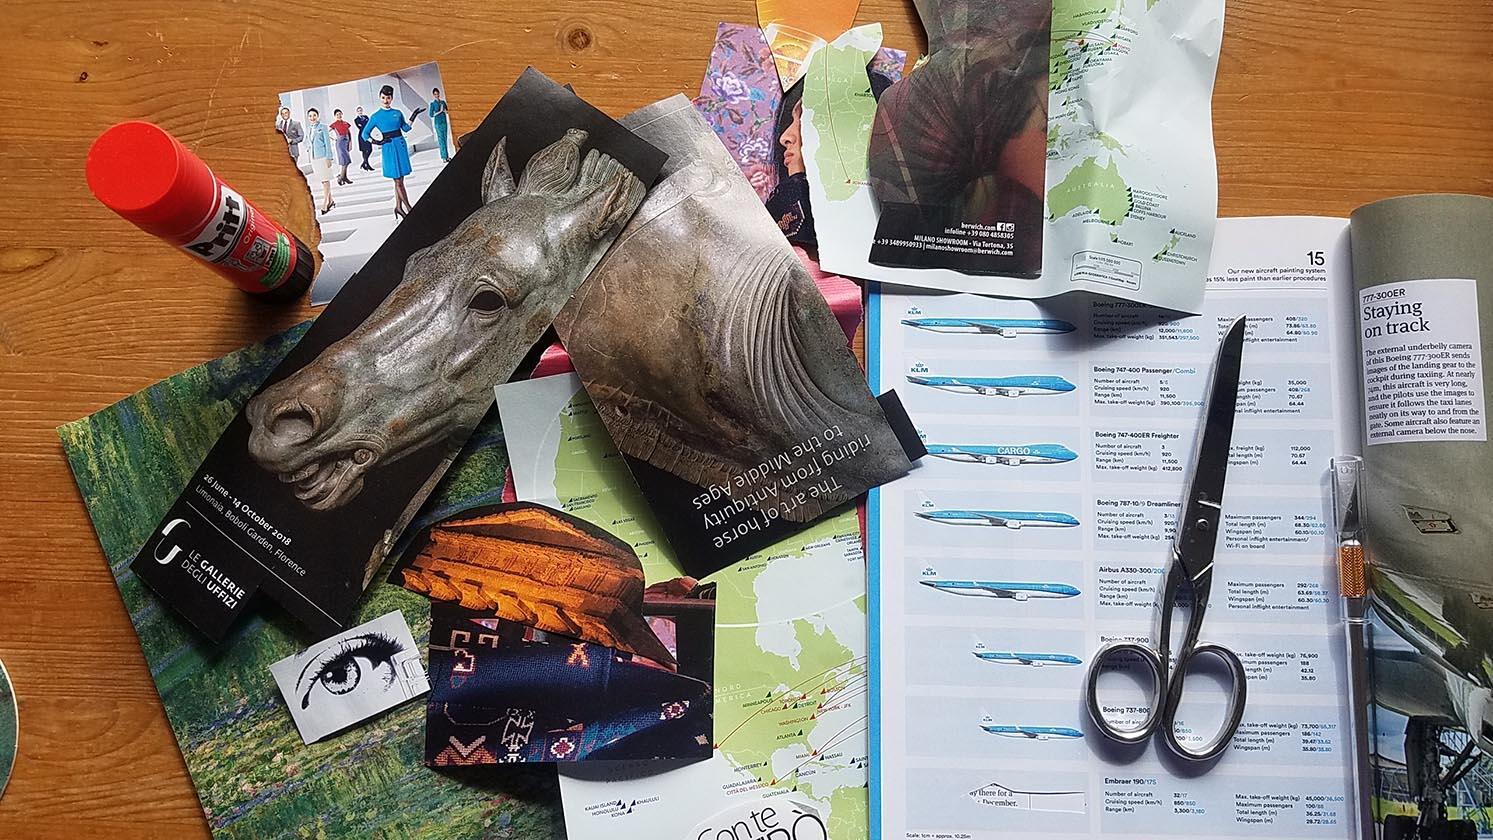
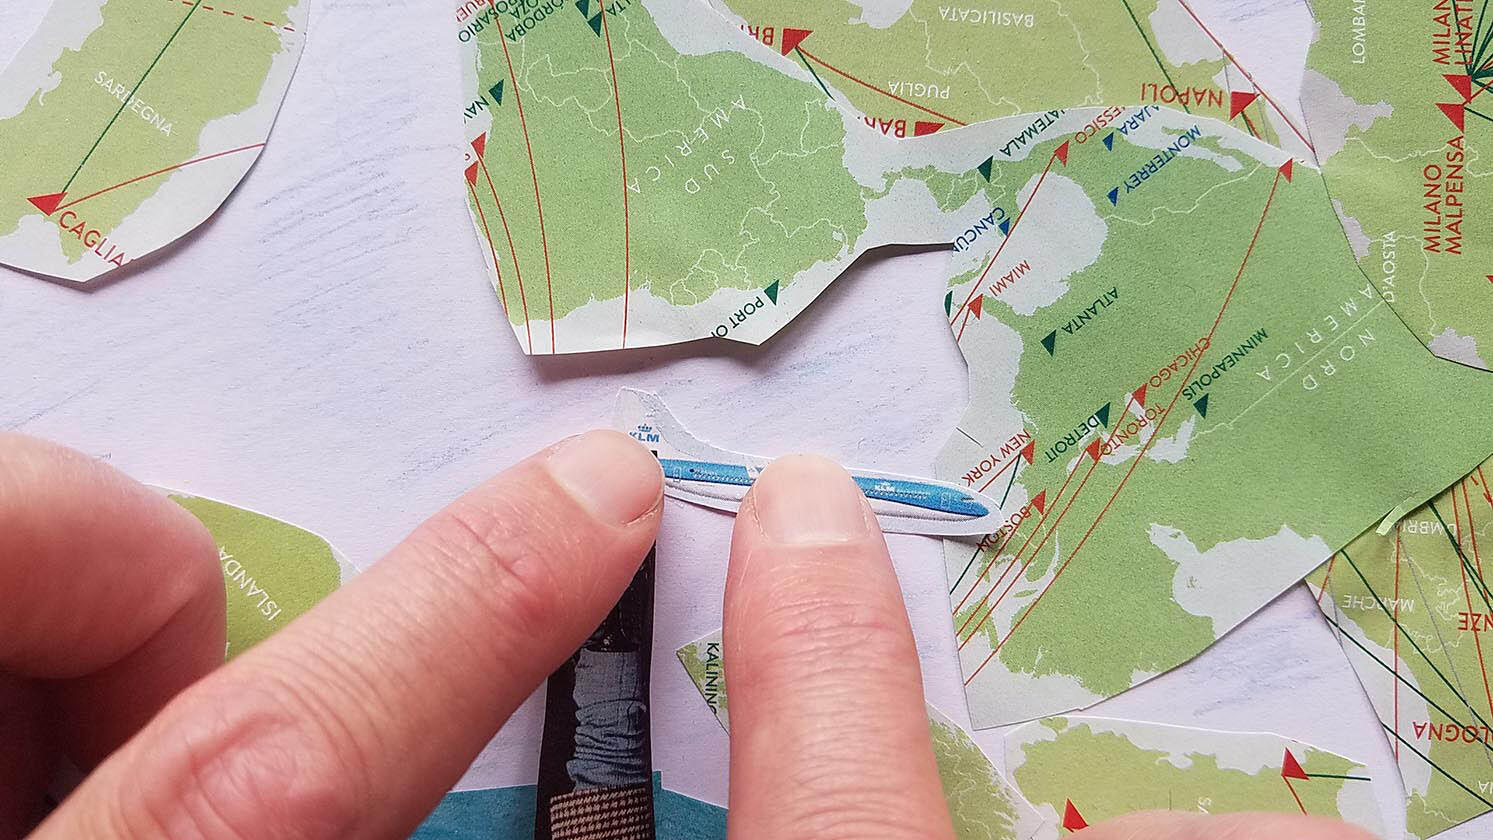
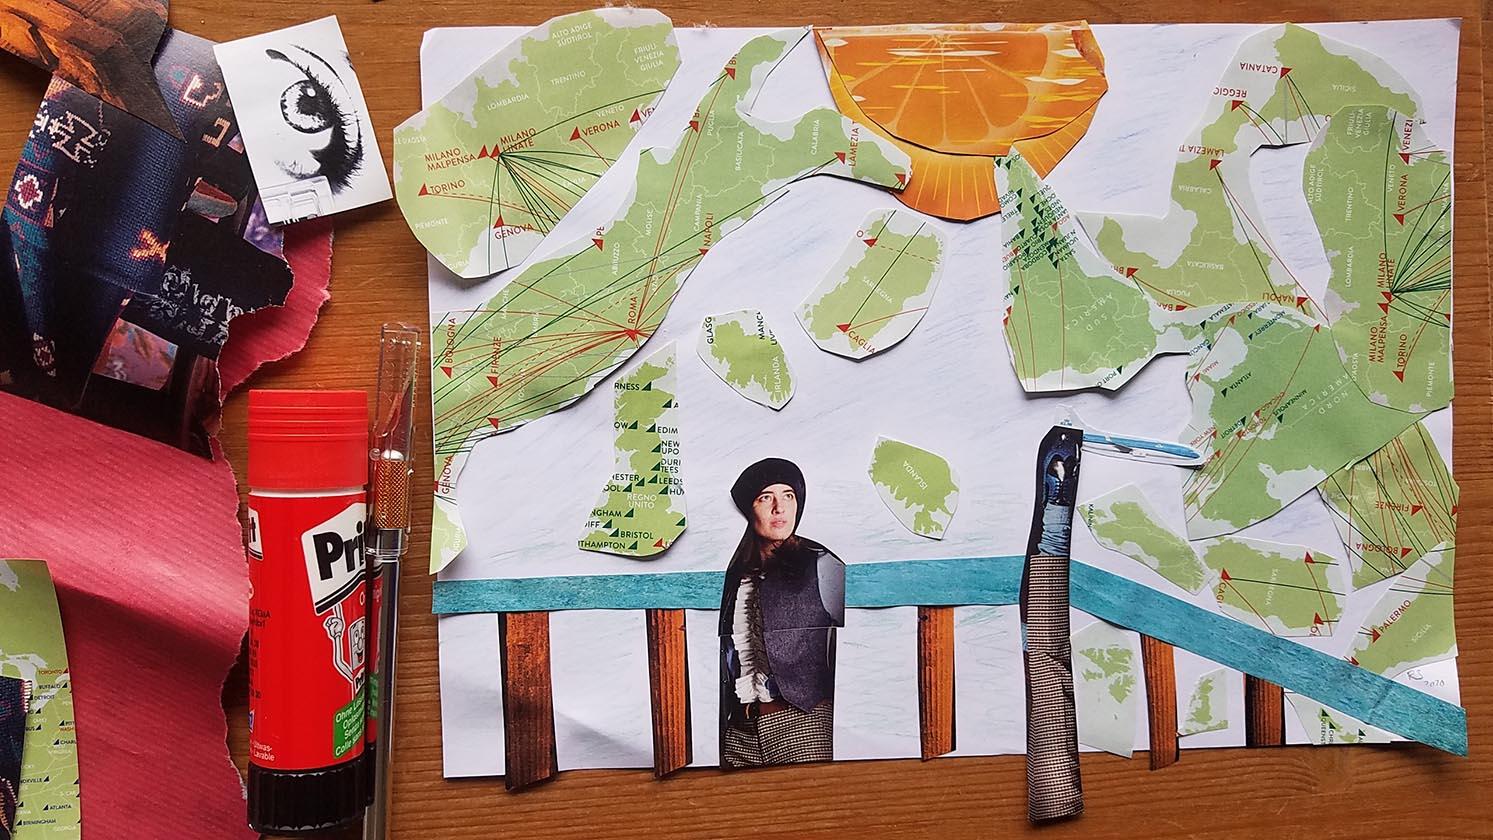
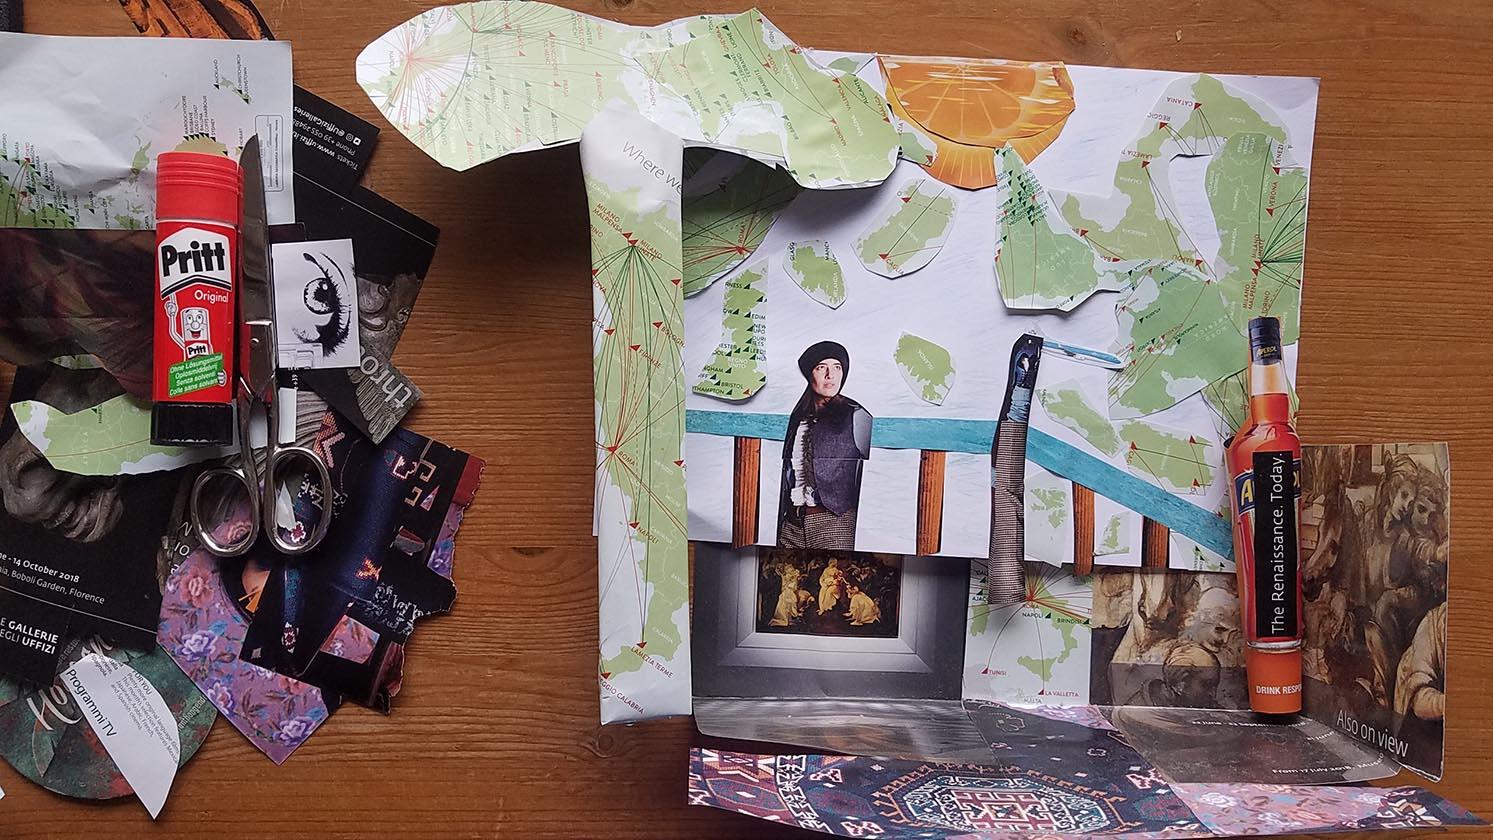
Photos by Francesca Bewer.
- Portrait drawing in colored pencil. Drawing by Ronald Stark.
- Collection of materials used for the collage
- Positioning and glueing of one of the pieces
- Finished 2-D collage
- Addition of 3-D elements
Reflect on your process of visual story telling. Did the materials you collected influence the outcome in unexpected ways? What was important to you? To represent or commemorate one or more particular events? to capture a mood? To symbolize values important to you?
Share your artwork and something about your process with us on social media by tagging @harvardartmuseums and using #ARTSFIRST and #MakeArt!
Learn more about the artist through the Romare Bearden Foundation, and the National Gallery of Art's The Art of Romare Bearden: A Resource for Teachers.
Collagraph
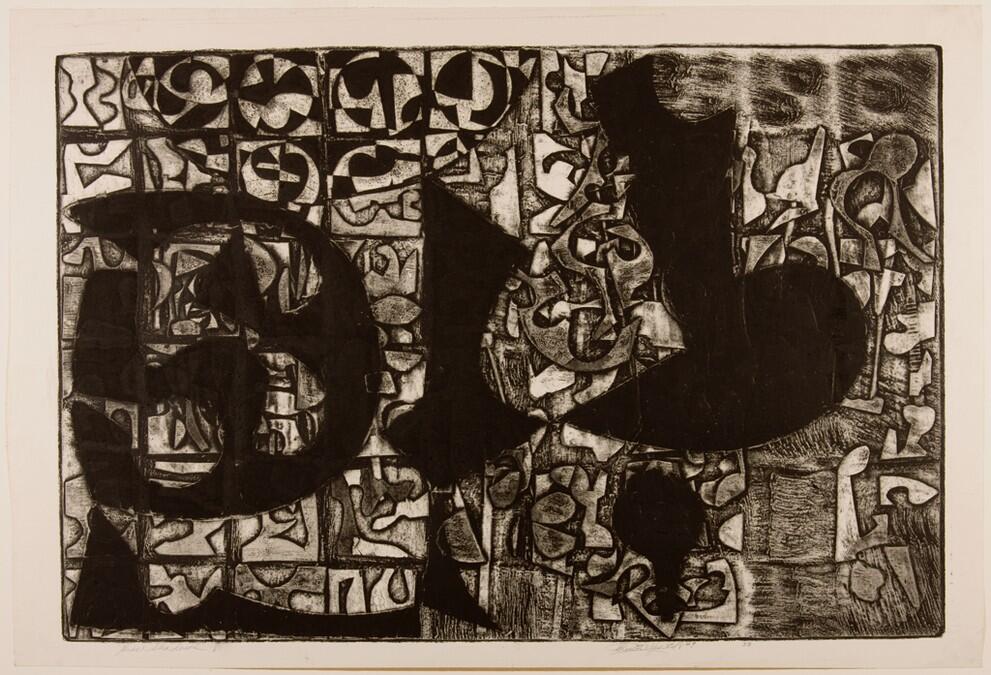
Pieces of cardboard, tape, metal scrap are among the stuff used in collography, a form of printmaking that makes use of found materials. The term "collagraph" (from the Greek koll or kolla (glue), and graph (the activity of drawing) was coined in the 1950s by American artist Glen Alps (1914-1996). It describes a process in which a print is made using a plate formed by a low relief collage of variously textured materials firmly attached to a rigid substrate. The inking can be done in relief or intaglio depending on the design. And the process may be combined with others, or involve multiple plates. The earliest example of a collage technique in printmaking may be the soldered, drilled and wired metal plates that the German artist Rolf Nesch (1893–1975) first experimented with starting in 1932.
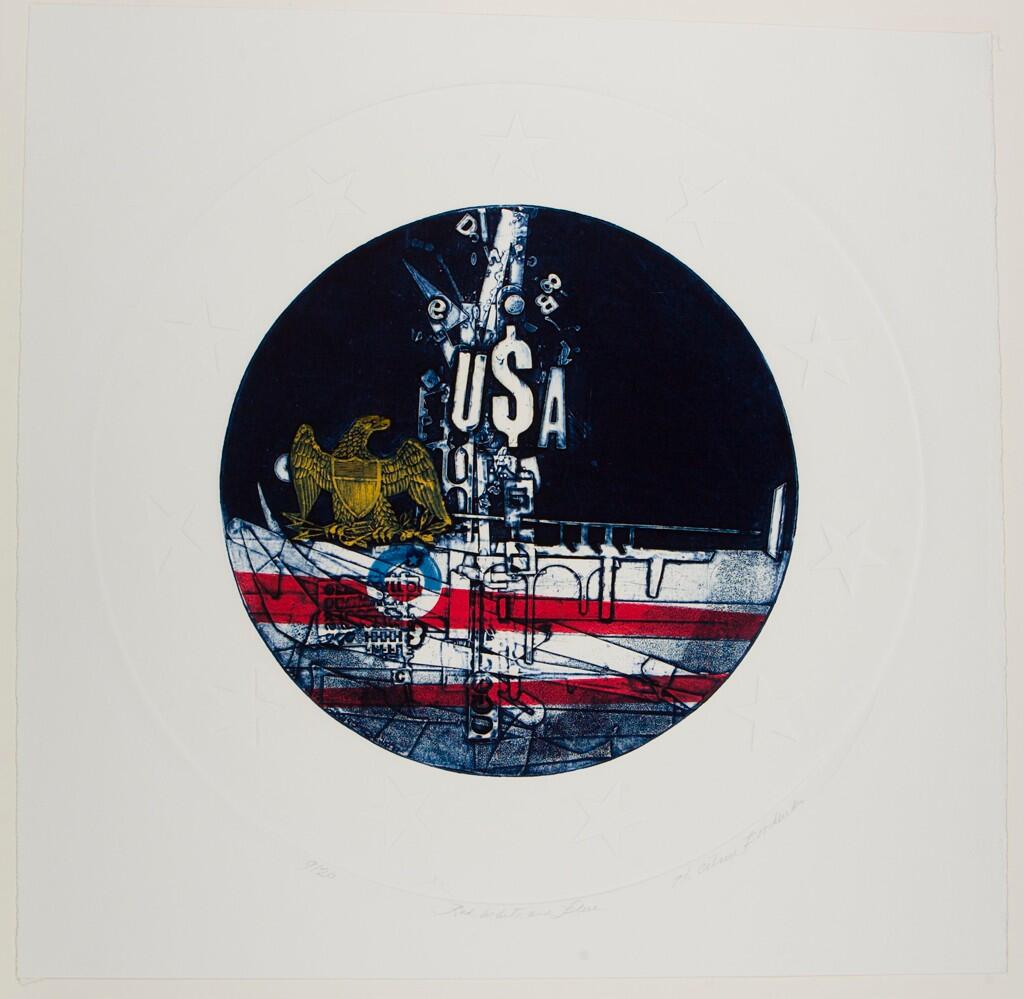
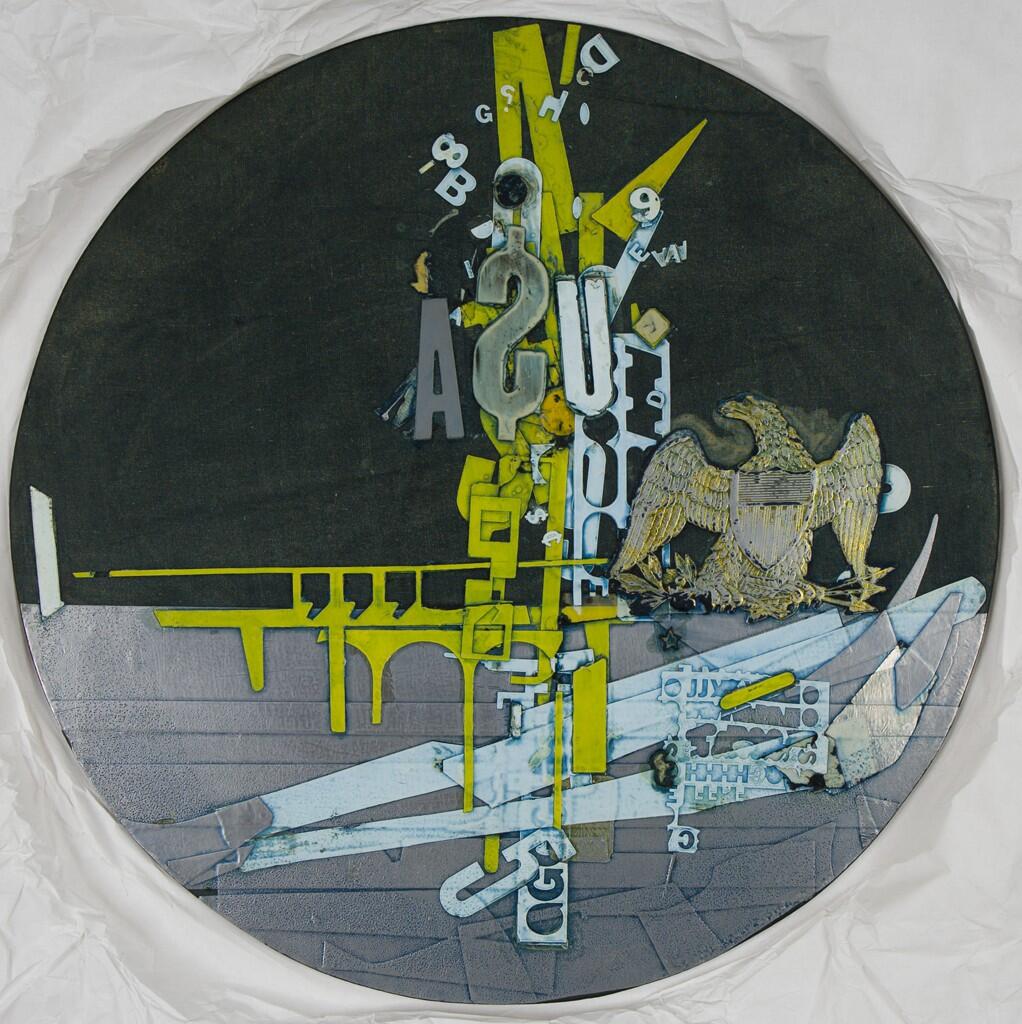
Collography gained popularity in the 1950s and is still practiced today. The process is appealing, among other things, for its experimental nature and the accessibility of its materials, and inherently lends itself to environmental, social and political statements. In Spain, collagraphy has even been proposed as an experimental pedagogical tool in secondary art education to introduce issues of ecological mindfulness and an appreciation of the “aesthetic education of recycling” along with instruction in printmaking.
Look closely at the detail of Helen Citron Boodman's Red, White and Blue with the corresponding detail of the plate for the print. What materials can you identify? Are they recognizable in the impressions that they produce in the print? Why do you think the artist chose them?
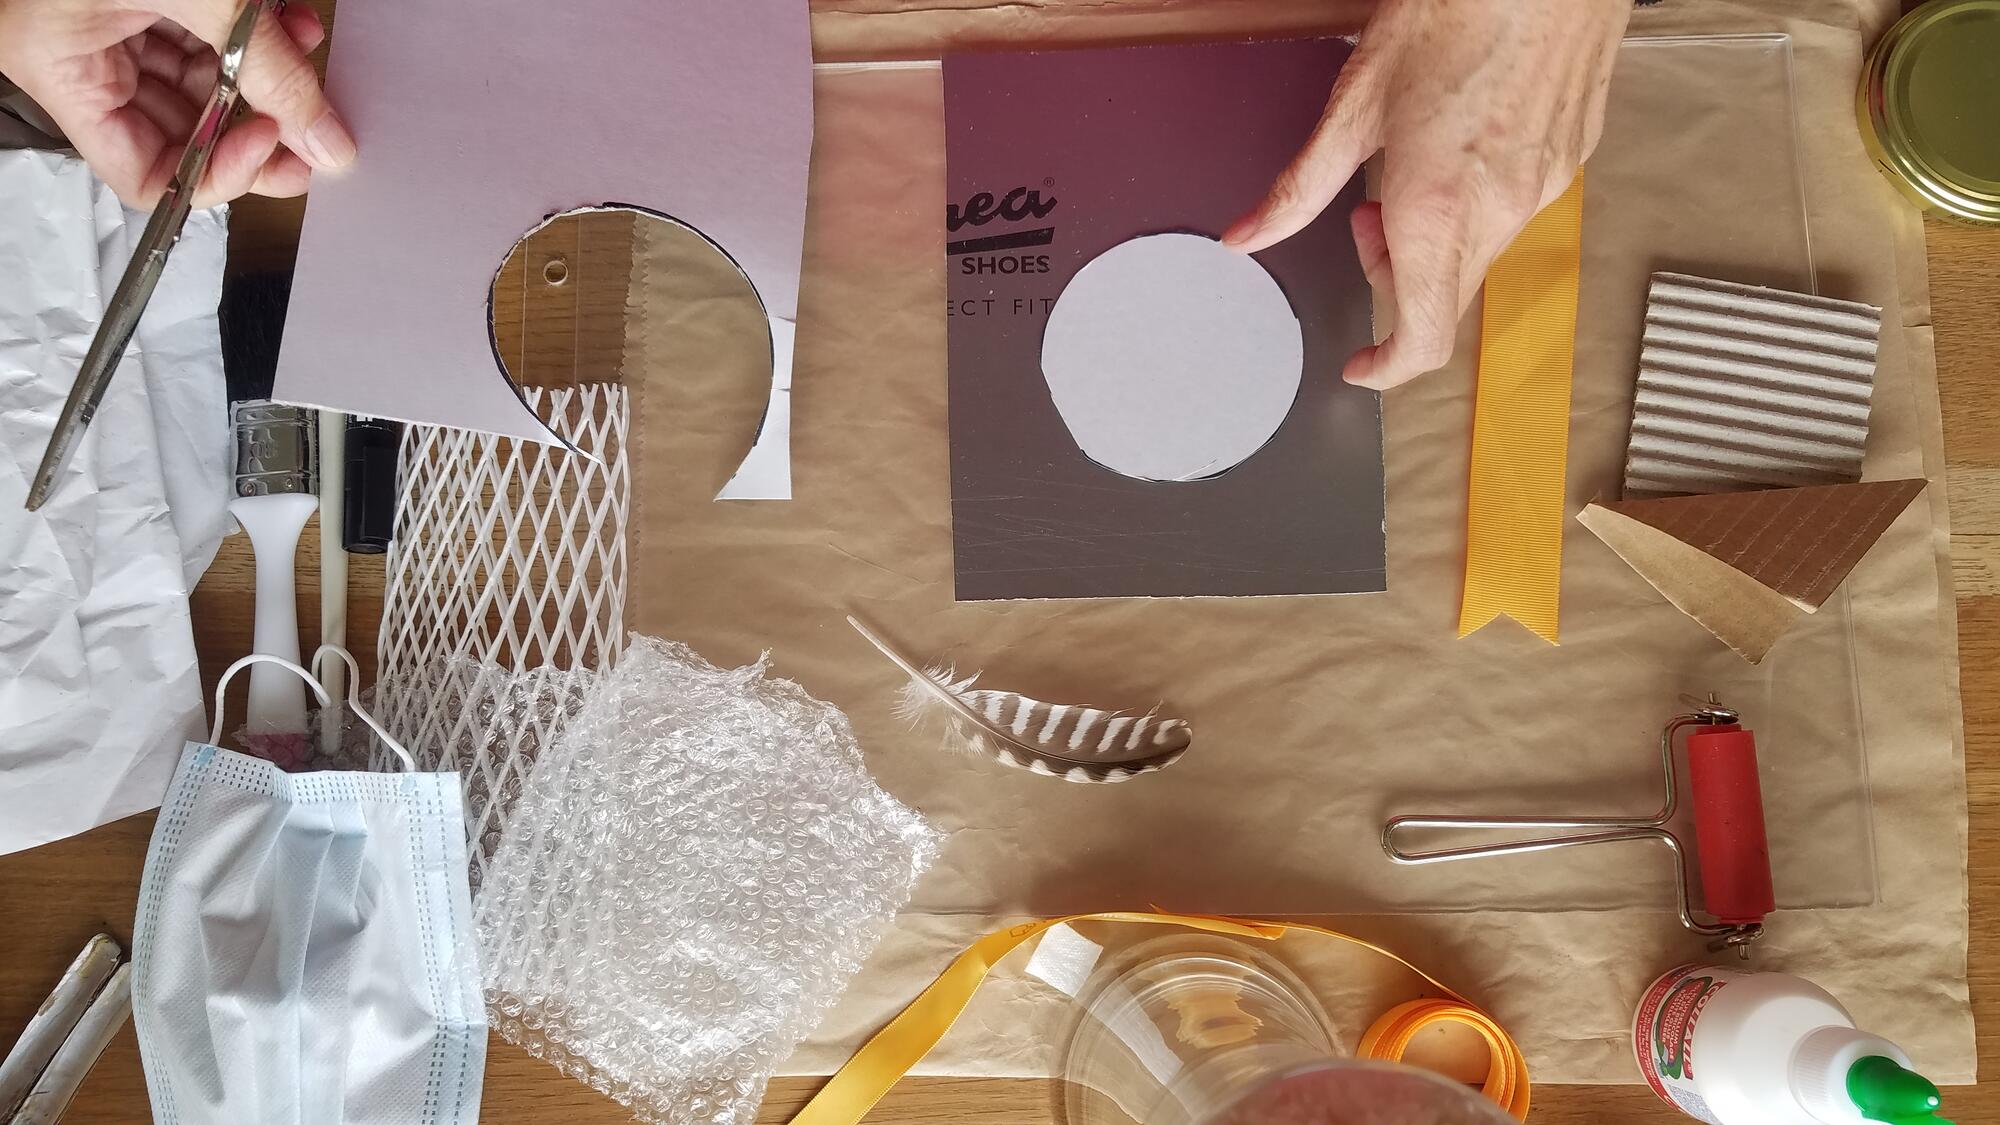
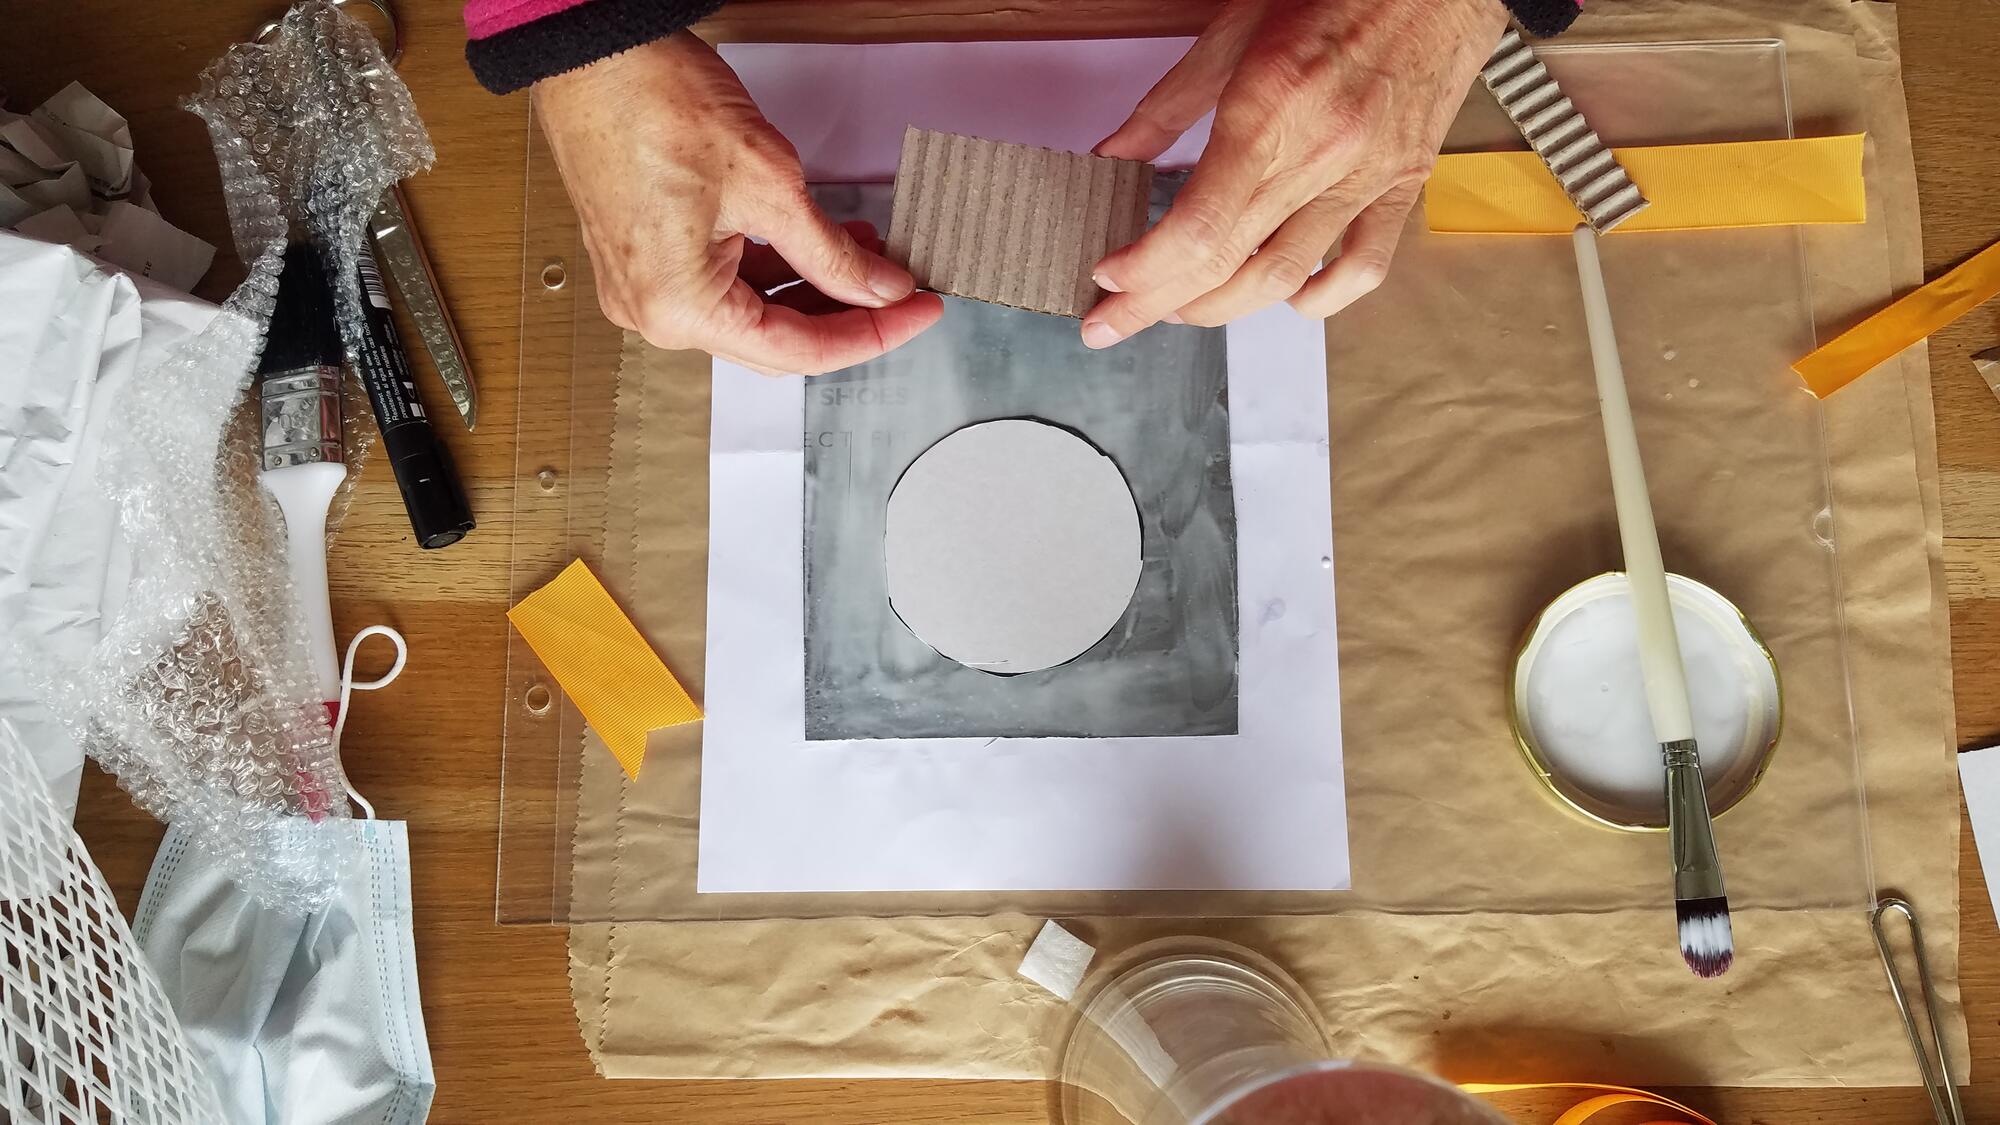
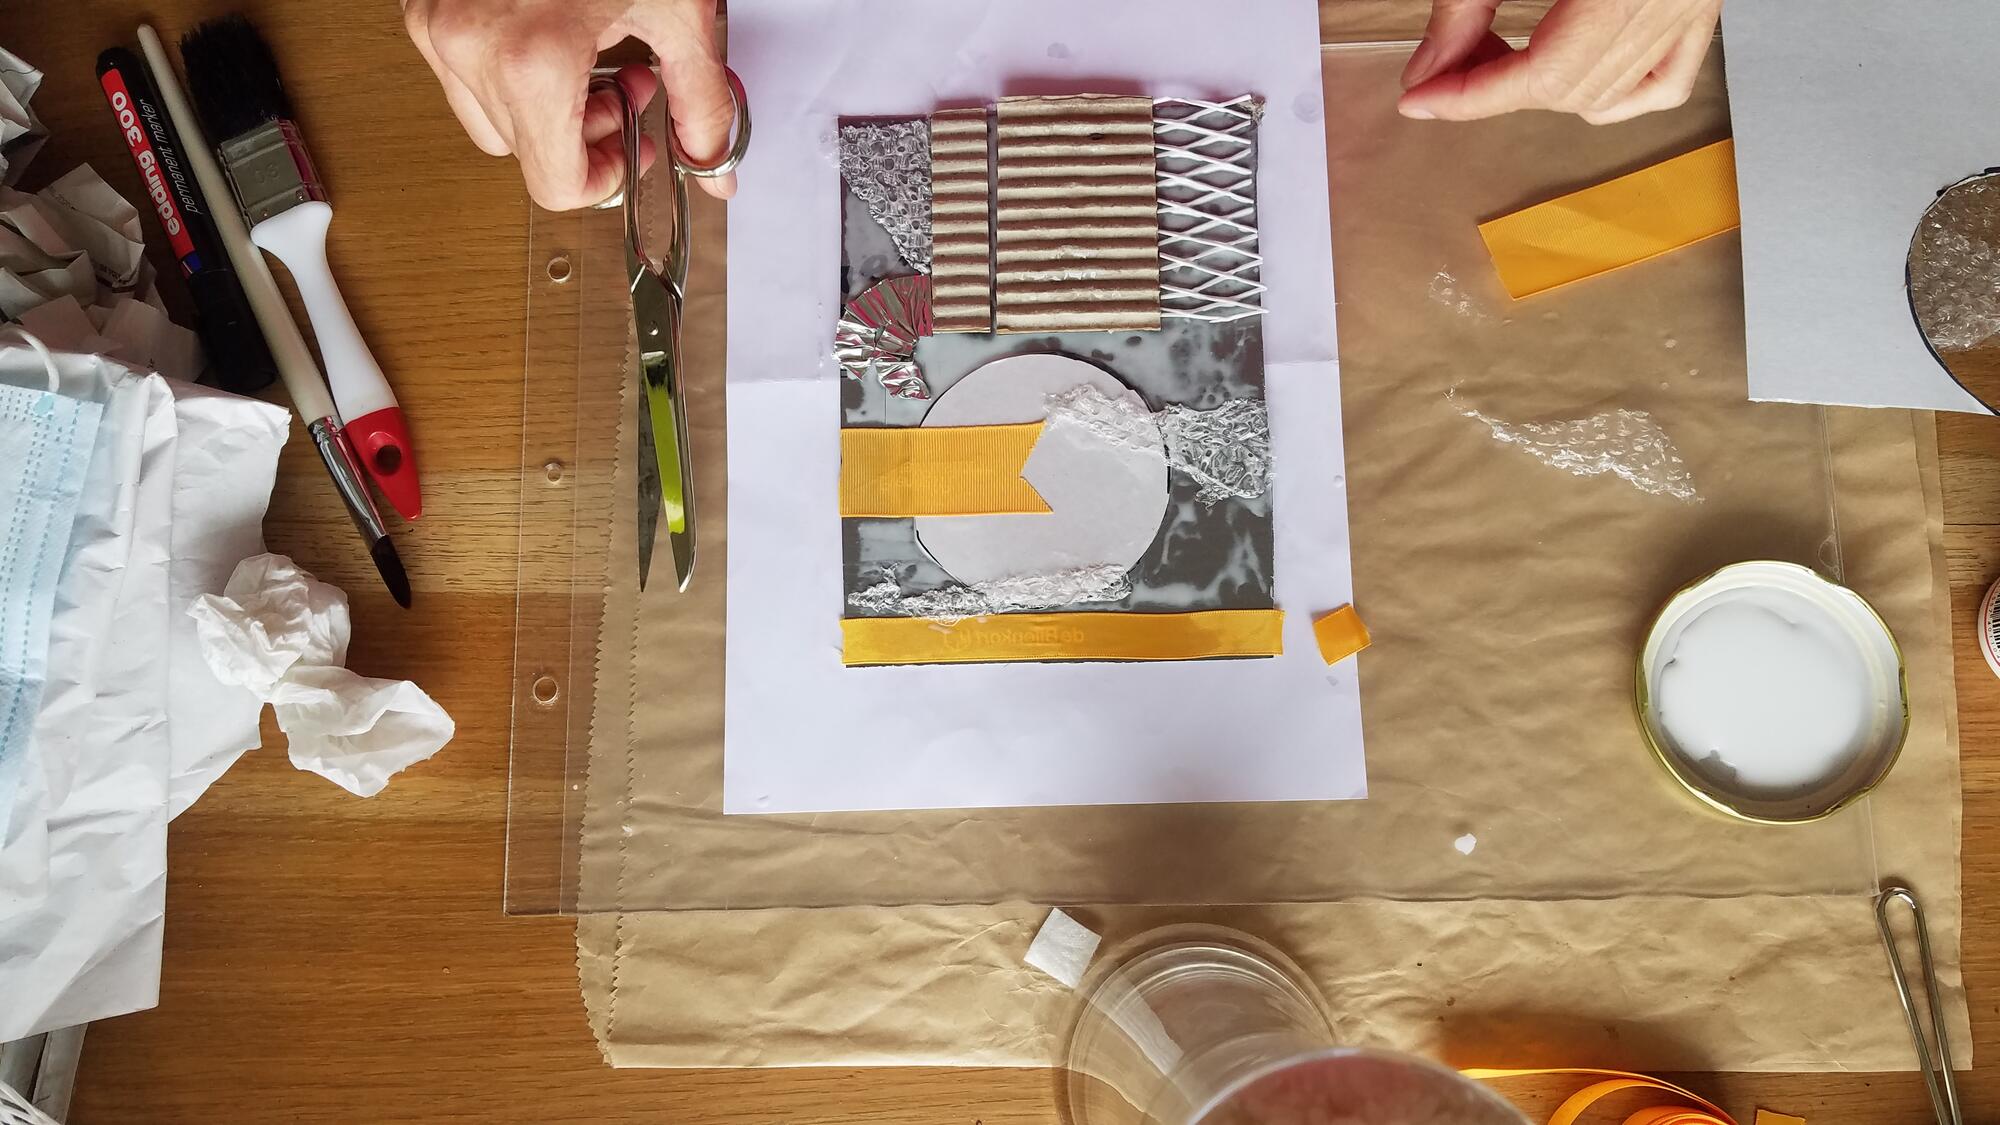

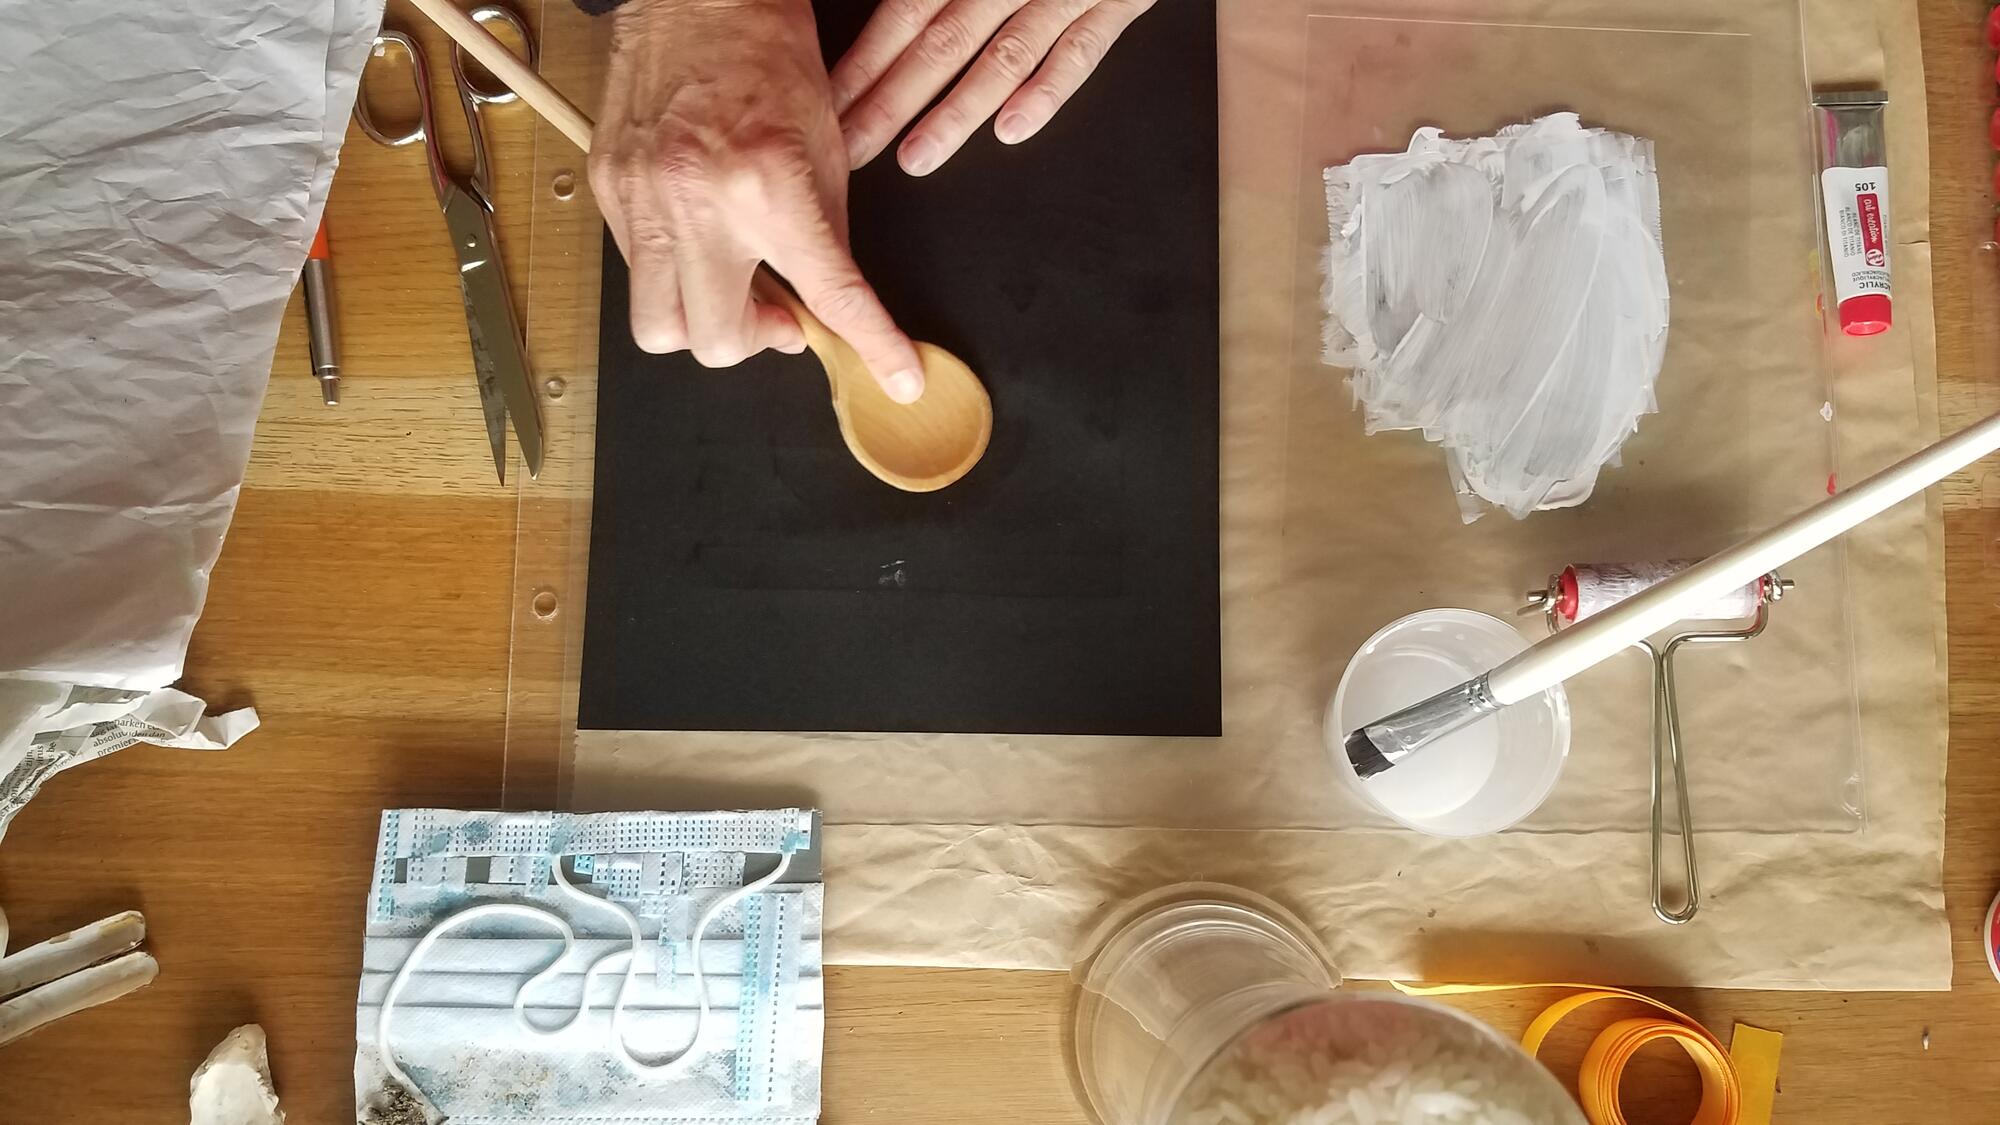
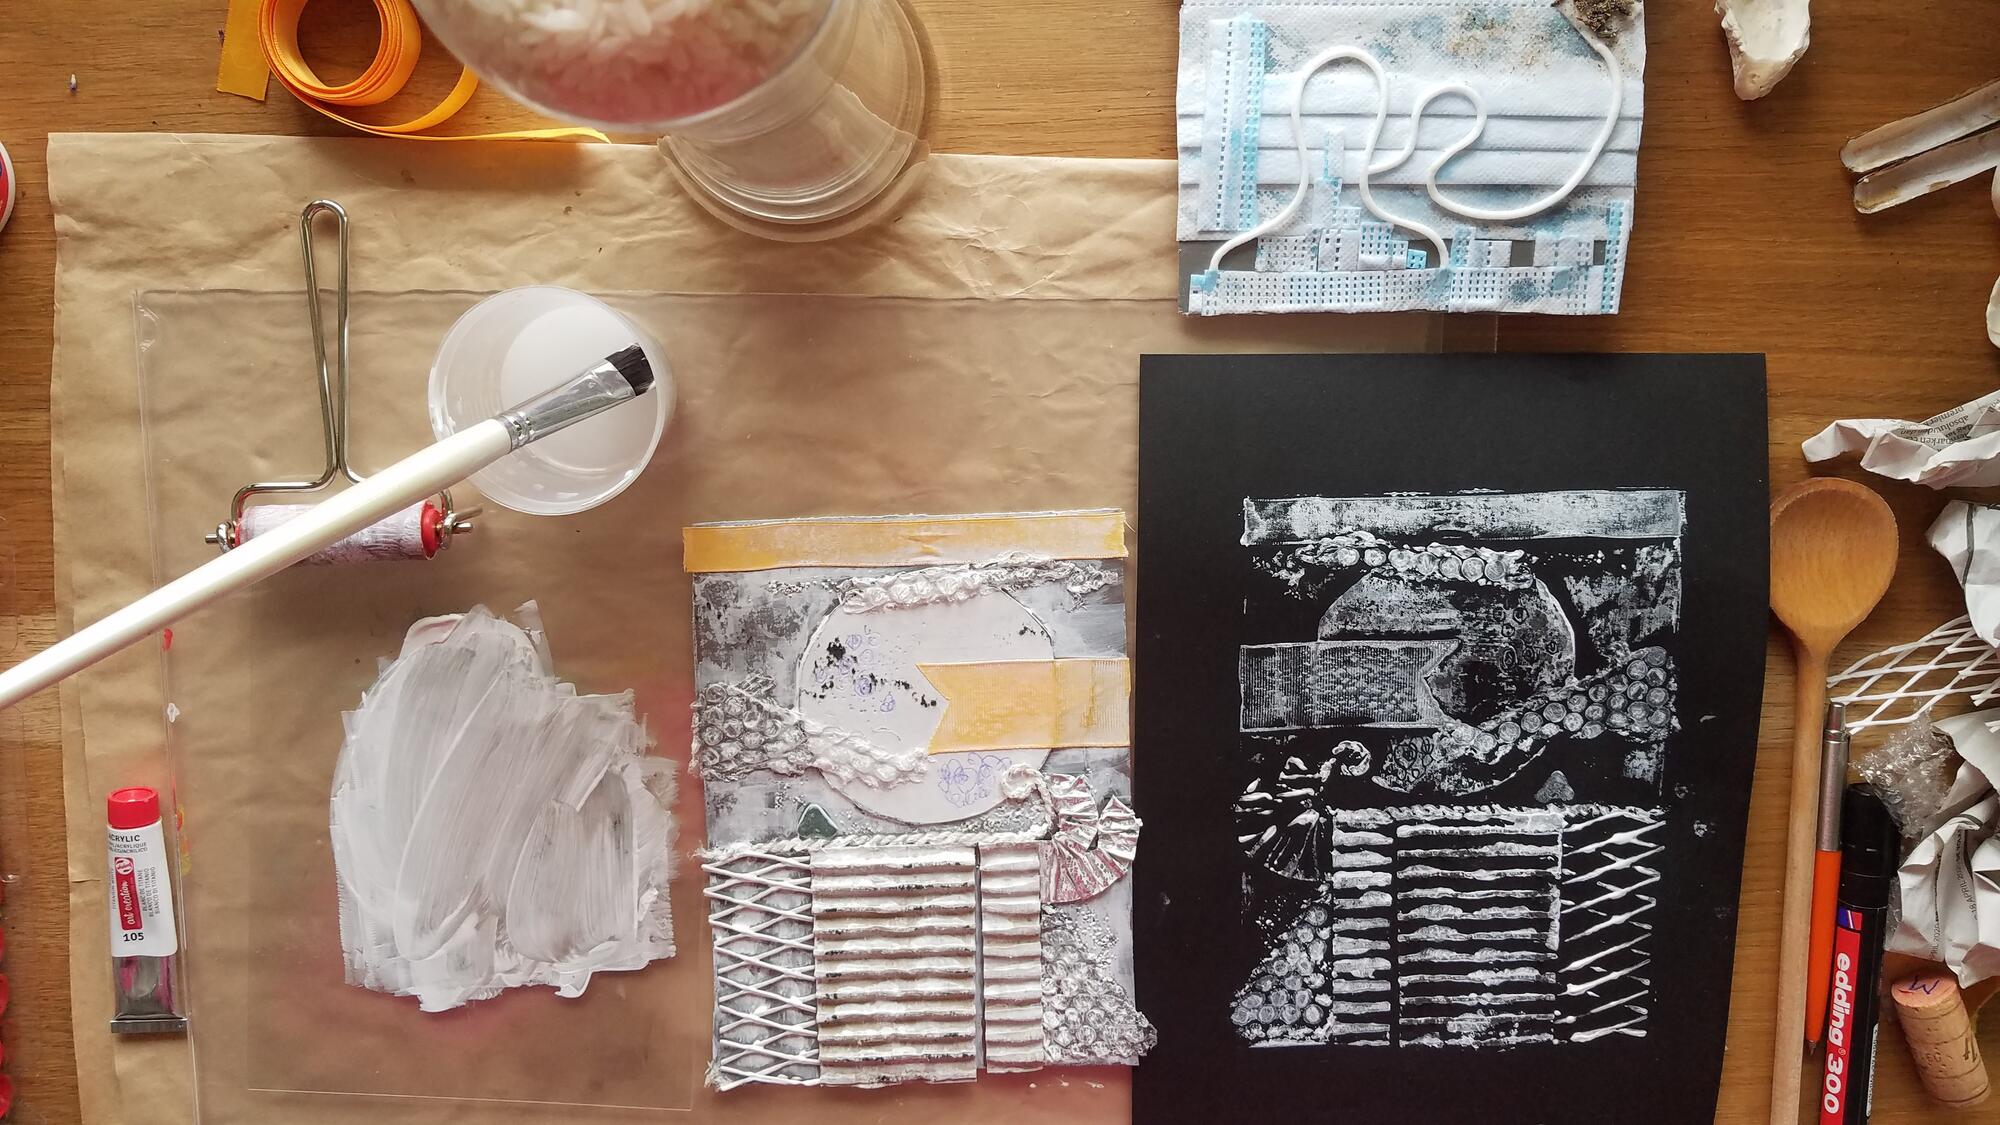
Photos by Francesca Bewer.
- Preparing the components of the collage plate
- Gluing down the collage elements
- Finishing the collage
- Inking
- Printing
- Pulling the print
Create a collagraph made of found materials. We invite you to experiment!
Materials needed:
- a sturdy substrate (e.g., masonite, firm plastic sheet)
- found materials from your recycling, fabric, grains, string (they should be relatively thin)
- cutting and scoring tools
- glue that will harden and be waterresistant (e.g., white PVA glue)
- block printing ink (or paint that has some body, or homemade printing ink)
- paint brush
- soft cloth or paper towel
- paper for printing, moistened
- a baren (a disk-like hand tool with a flat bottom used to firmly rub the back of a sheet of paper to transfer ink from the plate) or a large spoon
Steps:
- Make your printing plate by gluing disparate materials onto a rigid substrate to form a low-relief collage. Let the glue dry.
- Prepare your paper by wetting/moistening it. Blot off excess water before use.
- Ink the plate with a roller and/ or paintbrush. If you don’t have ink, try some viscous paint like acrylic.
- Print by placing the damp paper over the plate and apply pressure to it to transfer the ink from the plate to the paper.
- Gently peel the paper back to reveal your collagraph!
Reflect on your process. How did you choose your materials? Did anything surprise you during the process? What aspects did you experiment with?
And please share your artwork and something about your process with us on social media by tagging @harvardartmuseums and using #ARTSFIRST and #MakeArt!
Haiku and You: Painting Edo and the Arnold Arboretum
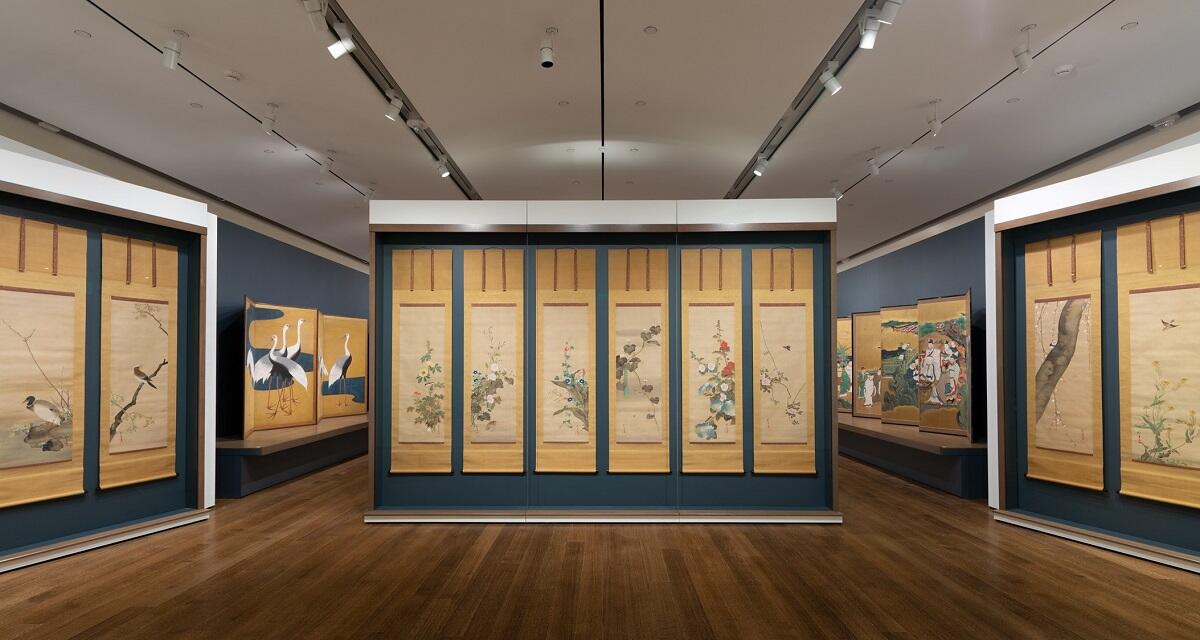
This spring, we invite you to be part of Haiku and You, a community of writers sharing the spirit of haiku and experiencing the restorative power of art and nature.
Haiku is a concise form of poetry that originated in Japan and became hugely popular during the Edo period (1615–1868). Haiku has since been adopted around the world as a means of capturing the ways in which the natural world and humanity intersect. It is a very image-rich form of poetry, offering a vivid snapshot capturing a moment in time.
Haiku is made up of just a few words that tell a story about what you see, what you think, or how you react to the world around you. It offers a chance to slow down, look closely, and see from a different perspective.
When writing your haiku, most importantly, remember to:
- Be in nature
- Be in the moment
- Be descriptive
- Be observant
- Be frugal with your words
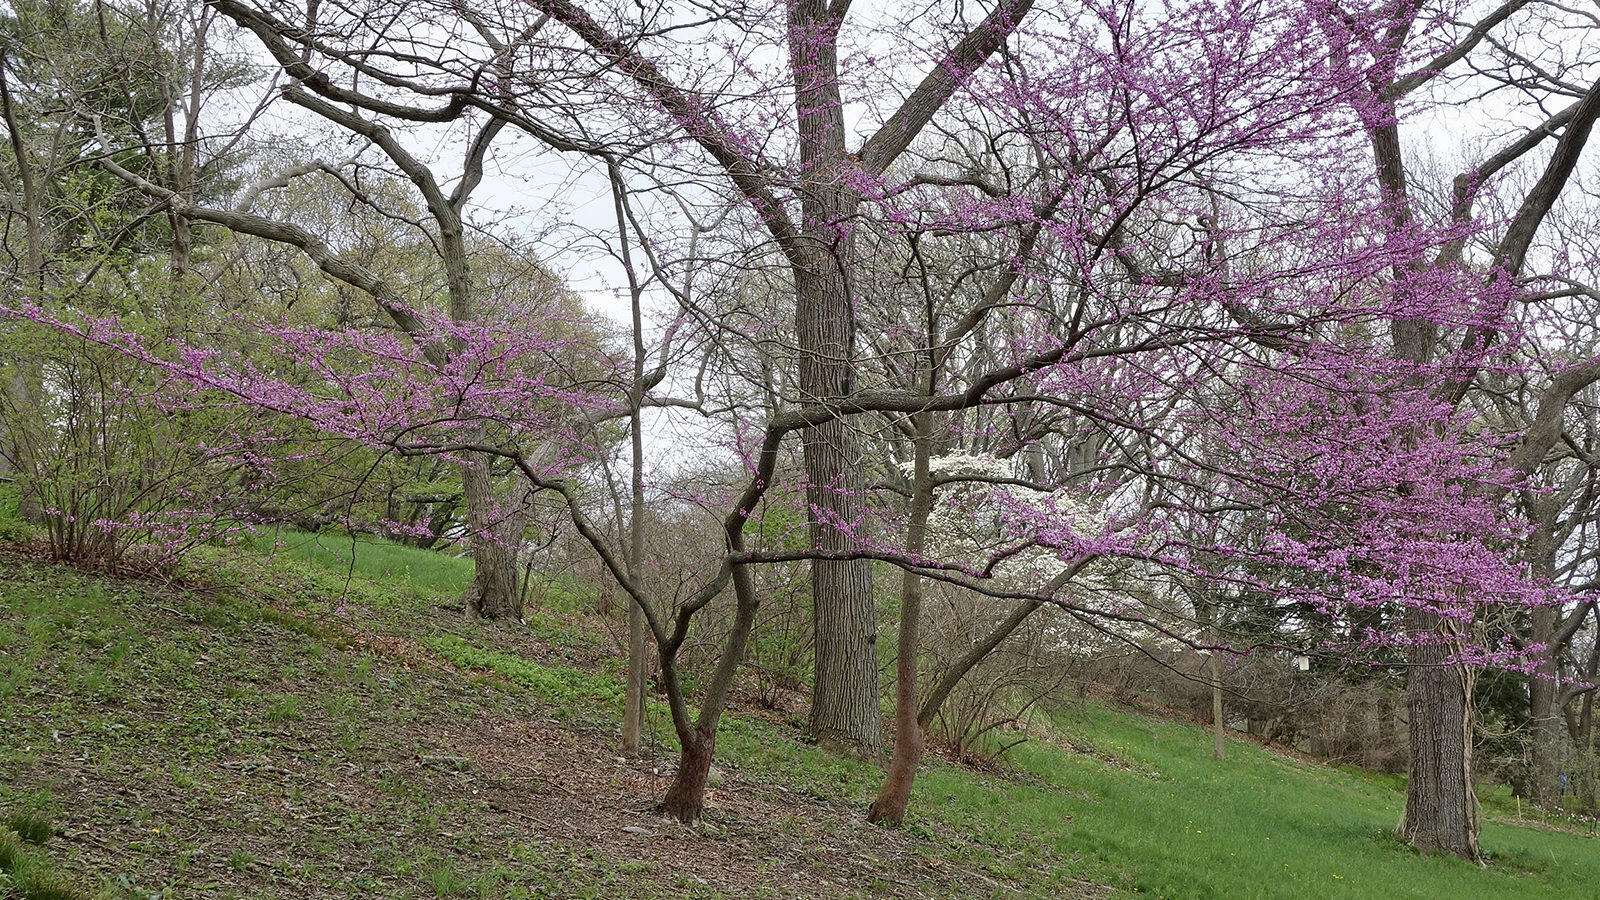
Visit hvrd.art/haikuandyou to learn more about how to write a haiku and to find inspiration for your own haiku practice in the landscape of the Arnold Arboretum and the exhibition Painting Edo: Japanese Art from the Feinberg Collection.
Let your senses wander. See, listen, touch, smell, or imagine the world around you and try to find the words that describe what you see, hear, or know.
Write your haiku on a piece of paper, then share it with us by taking a “haiku selfie” and submitting to our online gallery or tagging us on social media using #HaikuAndYou!
Follow us on social media (@harvardartmuseums and @arnold_arboretum) for plants, poetry, and paintings to inspire your haiku practice in the coming weeks.
ARTS FIRST Blackberry & Thyme Soda
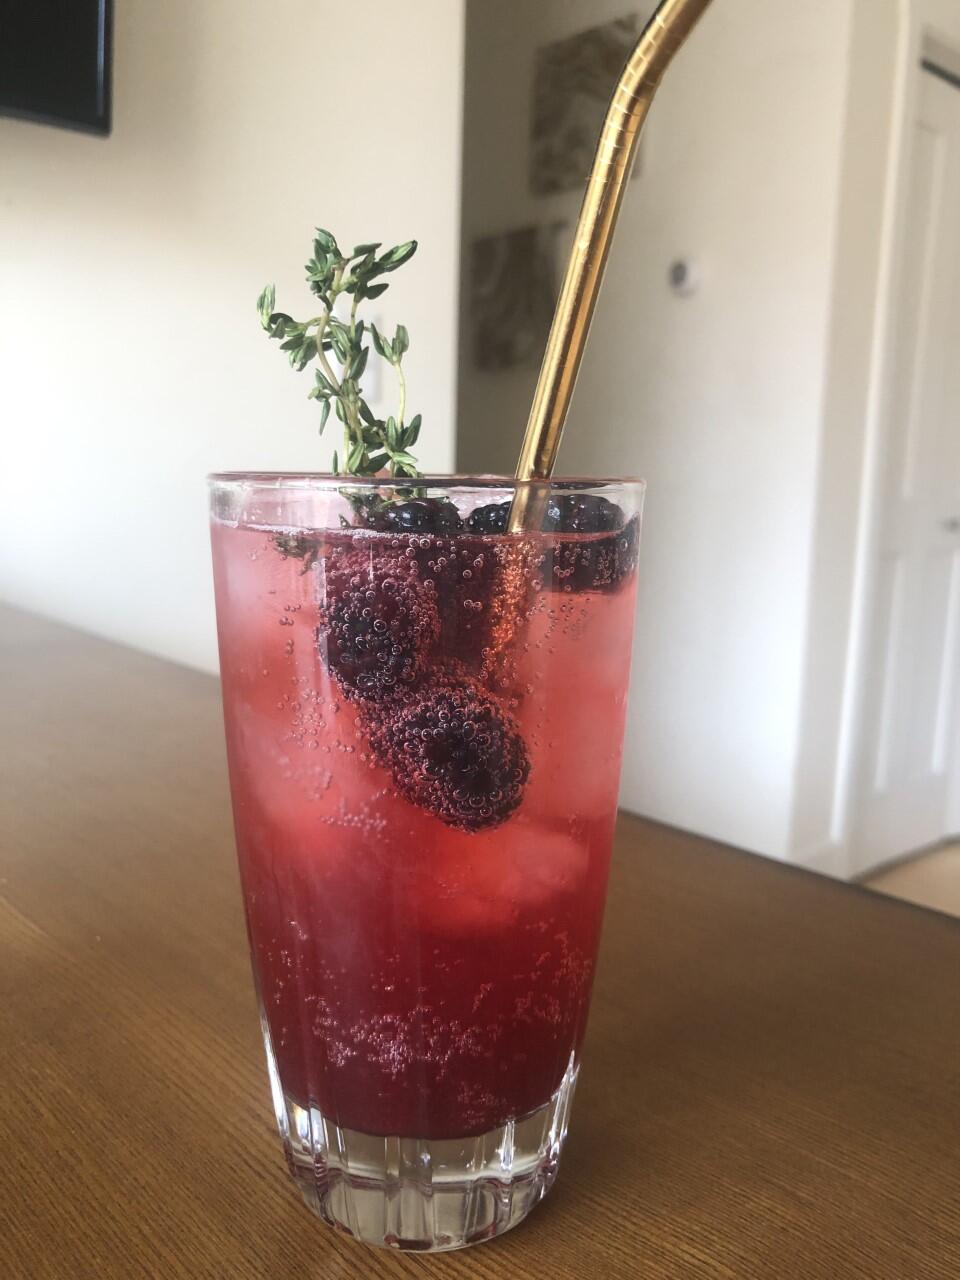
Our friends at Jenny’s Café have kindly prepared a purple drink recipe for this year’s ARTS FIRST Festival. Jenny’s Café may still be closed, but we hope that folks can make and enjoy this drink at home!
Ingredients
- 2 cups fresh blackberries*, washed
- 1/2 cup granulated sugar of your choice (something that will dissolve easily is best)
- 1/4 cup water
- 1 1/2 teaspoons of vanilla extract 1/2 lemon, juice and zest Sparkling water
- Fresh thyme
- Fresh blackberries for garnish
For the Syrup
- In a medium pot over medium heat, add the blackberries, sugar, water, lemon juice, lemon zest, 3-4 sprigs of thyme, and vanilla extract. Cover and bring the mixture to a simmer. Stirring occasionally, cook until all of sugar has dissolved and the blackberries have softened (about 8 minutes). Remove from heat and a use a potato masher or large spoon to squish the berries and extract all of their flavor (be sure to hold the pot firmly by the handle to prevent any accidents).
- Set a medium sized heat safe bowl in the sink and pour the syrup through a fine mesh strainer. Press the solids again to ensure that all of the liquid has been extracted from the berries. Discard the solids.
- Let the bowl of syrup cool in the fridge uncovered and then transfer to a tightly lidded bottle or jar. Store refrigerated for up to 2 weeks. Recipe yields about 1 1/2 cups of syrup.
Drink Assembly
Fill a 16oz glass to the top with ice. Add 3 tablespoons of the blackberry syrup. Top off with sparkling water and stir gently to combine. Garnish with fresh berries and a sprig of thyme. Enjoy!